|
|
The Restoration of the PDP-8/M Minicomputer (PAGE 2)
 S
M
L
XL
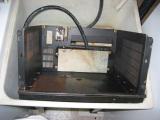
Once the case was cleaned and thoroughly sanded, I washed it in the sink
and then took it outside to be spray-painted.
S
M
L
XL
Once the case was cleaned and thoroughly sanded, I washed it in the sink
and then took it outside to be spray-painted.
|
 S
M
L
XL
I used Tremclad Rust Paint (flat black) and it looks like it did a superb job!
S
M
L
XL
I used Tremclad Rust Paint (flat black) and it looks like it did a superb job!
|
 S
M
L
XL
The power supply was the next thing to tackle; I completely disassembled it,
washed it (water and alcohol), sanded down the case, and spray painted it.
S
M
L
XL
The power supply was the next thing to tackle; I completely disassembled it,
washed it (water and alcohol), sanded down the case, and spray painted it.
|
 S
M
L
XL
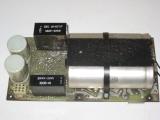
The capacitors are hidden on the underside.
The two large ones are 24mF @ 50V, and the two small ones are 3mF @ 25V and 6mF @ 10V.
(The two black rectangles on the left are, luckily, not capacitors at all, but rather the L1 and L2 100µH chokes.)
S
M
L
XL
The capacitors are hidden on the underside.
The two large ones are 24mF @ 50V, and the two small ones are 3mF @ 25V and 6mF @ 10V.
(The two black rectangles on the left are, luckily, not capacitors at all, but rather the L1 and L2 100µH chokes.)
|
 S
M
L
XL
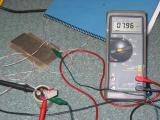
This picture shows the capacitor reformation jig (connected to 3 x 12V batteries, which are part of my UPS).
See the writeup on capacitor reformation on the PDP12 power supply
for more information on how it's done, the math, and schematics for the reformation jig.
S
M
L
XL
This picture shows the capacitor reformation jig (connected to 3 x 12V batteries, which are part of my UPS).
See the writeup on capacitor reformation on the PDP12 power supply
for more information on how it's done, the math, and schematics for the reformation jig.
|
 S
M
L
XL
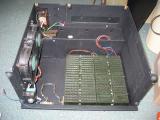
This is the case and power supply and fan assemblies fully re-assembled, just before power up.
Being paranoid, I put the whole thing on a power bar that's off, and put the unit as far away from me as possible.
Then, with the power switch on the 8 turned to the "off" position, I turned on the power bar for 5 seconds.
No sparks.
Then I turned it on for 30 seconds.
No sparks.
Nothing got hot.
Then I turned on the power switch on the 8, and turned on the power bar for 5 seconds.
All three fans worked, and no sparks.
Finally, I turned on the power switch for 1 minute.
No sparks, and nothing got hot.
Emboldened by this, I left the power bar on and controlled the power from the power switch.
I measured the voltages, and they were all within tolerance (this is with no cards installed).
S
M
L
XL
This is the case and power supply and fan assemblies fully re-assembled, just before power up.
Being paranoid, I put the whole thing on a power bar that's off, and put the unit as far away from me as possible.
Then, with the power switch on the 8 turned to the "off" position, I turned on the power bar for 5 seconds.
No sparks.
Then I turned it on for 30 seconds.
No sparks.
Nothing got hot.
Then I turned on the power switch on the 8, and turned on the power bar for 5 seconds.
All three fans worked, and no sparks.
Finally, I turned on the power switch for 1 minute.
No sparks, and nothing got hot.
Emboldened by this, I left the power bar on and controlled the power from the power switch.
I measured the voltages, and they were all within tolerance (this is with no cards installed).
|
|
|